
Homemade Peri Peri chicken is one of those things I never thought I'd nail in my own kitchen. Nando's kind of ruined me for the restaurant version — that smoky, tangy, spicy sauce with the char on the chicken felt hard to replicate at home. But this recipe does it. And once you make the sauce from scratch, going back to the bottled stuff feels wrong.
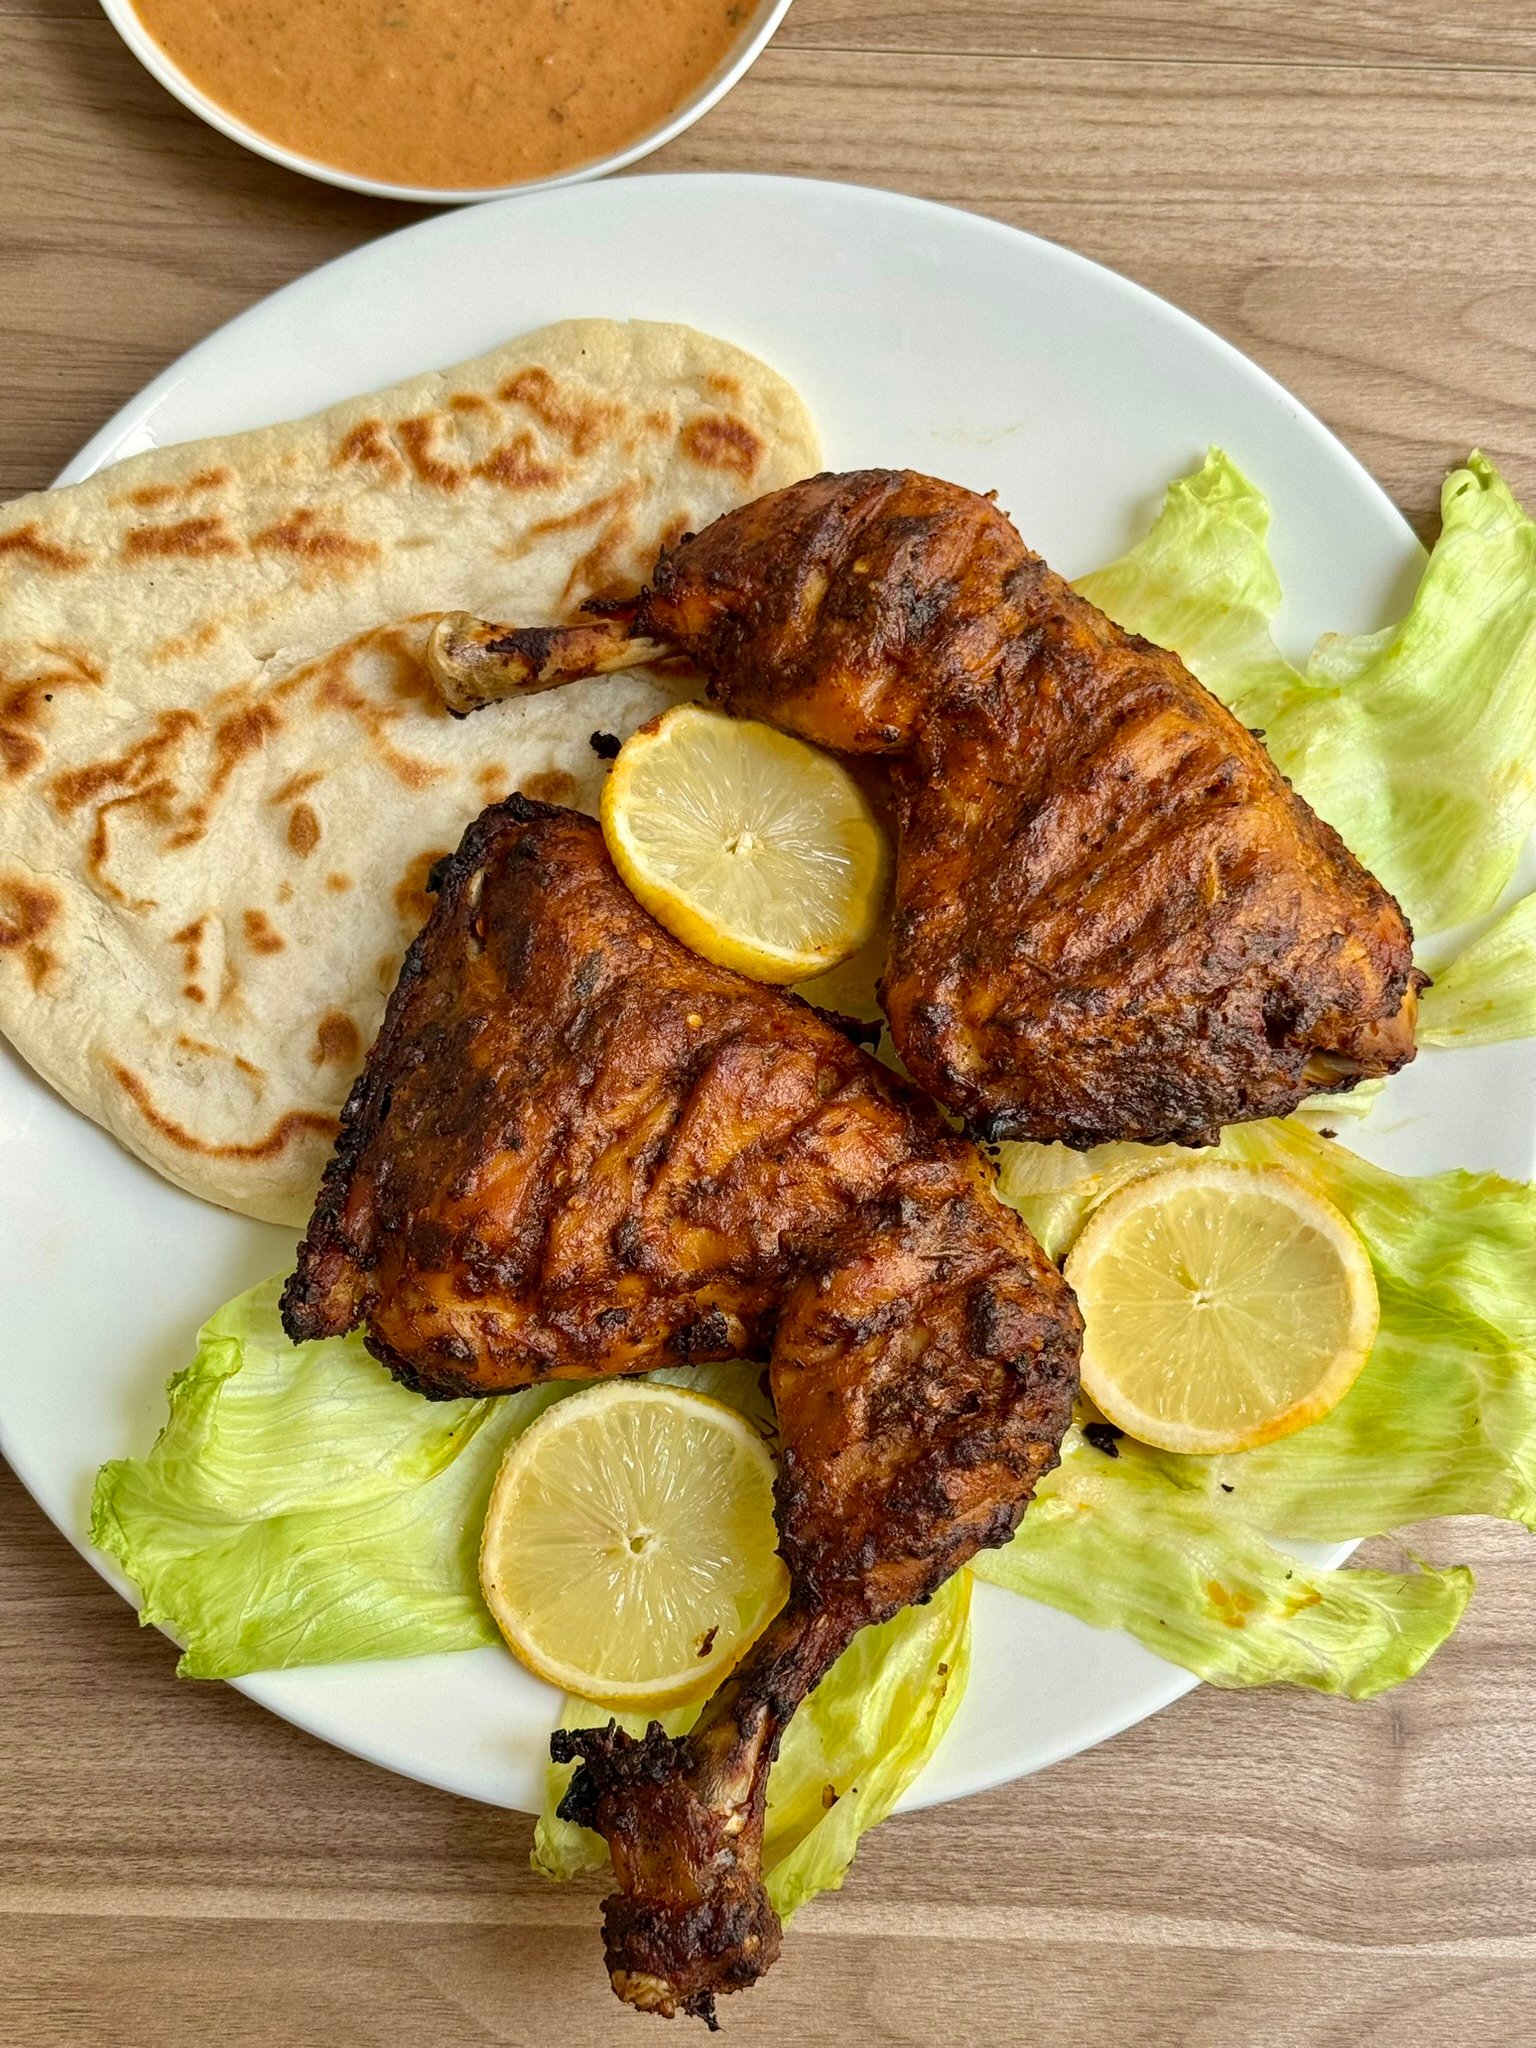
The trick is roasting the sauce ingredients before blending, and giving the chicken TWO rounds of marination. That's what gets you real depth of flavor at home.
What Makes This Peri Peri Chicken Different?
Most homemade Peri Peri recipes I've tried have the same problem. They blend everything raw, marinate the chicken, and call it a day. The result tastes fine but flat, without the depth you get at a good restaurant.
This recipe does two things differently.
FIRST, we roast the bell pepper, chilies, garlic, and onion in the oven before they go into the blender. This concentrates their flavor, mellows the raw sharpness of the garlic and onion, and gives the sauce a smoky, slightly caramelized base you can't get from raw ingredients.
SECOND, we marinate the chicken TWICE. Once with just salt and pepper (to season the meat itself), then again with the sauce (for flavor and color). It's an extra step but the payoff is real. The meat is seasoned all the way through, not just coated in sauce on the outside.
Ingredient Notes
Here's what to look for and why each thing matters. All measurements are in the recipe card at the bottom.
- Chicken cut. Bone-in, skinless thighs and drumsticks (or full leg quarters) are the way to go. They stay juicy through the long cook, and the bones add flavor. Chicken breast works but dries out fast — if that's all you have, cut the cook time and check for doneness early.
- Scotch bonnet peppers. These are what make it Peri Peri. They're hot, fruity, and slightly floral — very different from just adding more chili flakes. If you can't find them, habaneros are the closest sub. If you can't find either, skip them and lean on the cayenne. The sauce will still be good, just less complex.
- Red bell pepper and green chili. These do the heavy lifting for body and heat. The bell pepper gives sweetness and thickness; the green chili adds fresh heat. If you want a milder sauce, go bigger on the bell pepper and smaller on the chili.
- Apple cider vinegar. DO NOT swap this for white vinegar or regular distilled — you'll lose the fruity tang. If you don't have ACV, white wine vinegar is the closest. In a pinch, red wine vinegar works too, but the color will be darker.
- Tomato paste (not fresh tomato). Paste gives you concentrated tomato flavor without adding water. Fresh tomatoes will thin the sauce and make it watery.
- Lemon juice AND zest. Both are needed. Juice for the acidity, zest for the aromatic oils. Fresh lemon only — bottled juice tastes flat.
- Cayenne pepper. This is your heat dial. Skip it entirely for a mild sauce, use as-listed for medium, double it if you like it hot. Scotch bonnets vary a lot batch to batch, so taste and adjust.
- Oregano. Traditional Piri Piri uses dried oregano, which gives a warm, earthy background note. DO NOT skip it thinking it's a filler ingredient. Fresh oregano works too if you have it.
Understanding the Sauce
The sauce is honestly the whole point of this dish. Get it right and you have something that works on grilled chicken, roasted potatoes, sandwiches, and pretty much anything else you can dip in it. Get it wrong and no amount of marination will save the chicken.
Roast, don't blend raw
Every ingredient that goes into the blender (bell pepper, chilies, garlic, onion, scotch bonnets) gets roasted at high heat first. This does three things. It softens them enough to blend smoothly, it mellows the raw bite of the garlic and onion, and it adds a slight char that carries through the finished sauce. Skipping this step is where most homemade Peri Peri falls flat.
Roast until wilted and charred at the edges. A little browning is exactly what you want — flip the pieces halfway through so both sides get color.
Split the sauce BEFORE marinating
Once the sauce is blended, set aside about a third of it BEFORE it touches the chicken. This portion is your basting sauce during the cook and your dipping sauce at the end.
Why this matters — if you dip your basting brush into sauce that touched raw chicken, you're brushing cooked chicken with raw-chicken sauce. Not great. Reserve first, then marinate.
The reserved portion also gets mixed with mayo (or yogurt, or sour cream) at the end for a creamy dip. This mellows the heat and turns it into something you can spoon over rice or dunk fries into.
Storage
The sauce keeps for up to 2 weeks in a sealed jar in the fridge. It also freezes well — pour it into an ice cube tray, freeze, then pop the cubes into a bag for portioned use later. Great to have on hand for weeknight roast chicken or grain bowls.
The Cook — What to Watch For
The recipe card walks you through the steps. This section covers the judgment calls that separate a dry, overcooked chicken from a properly juicy one.
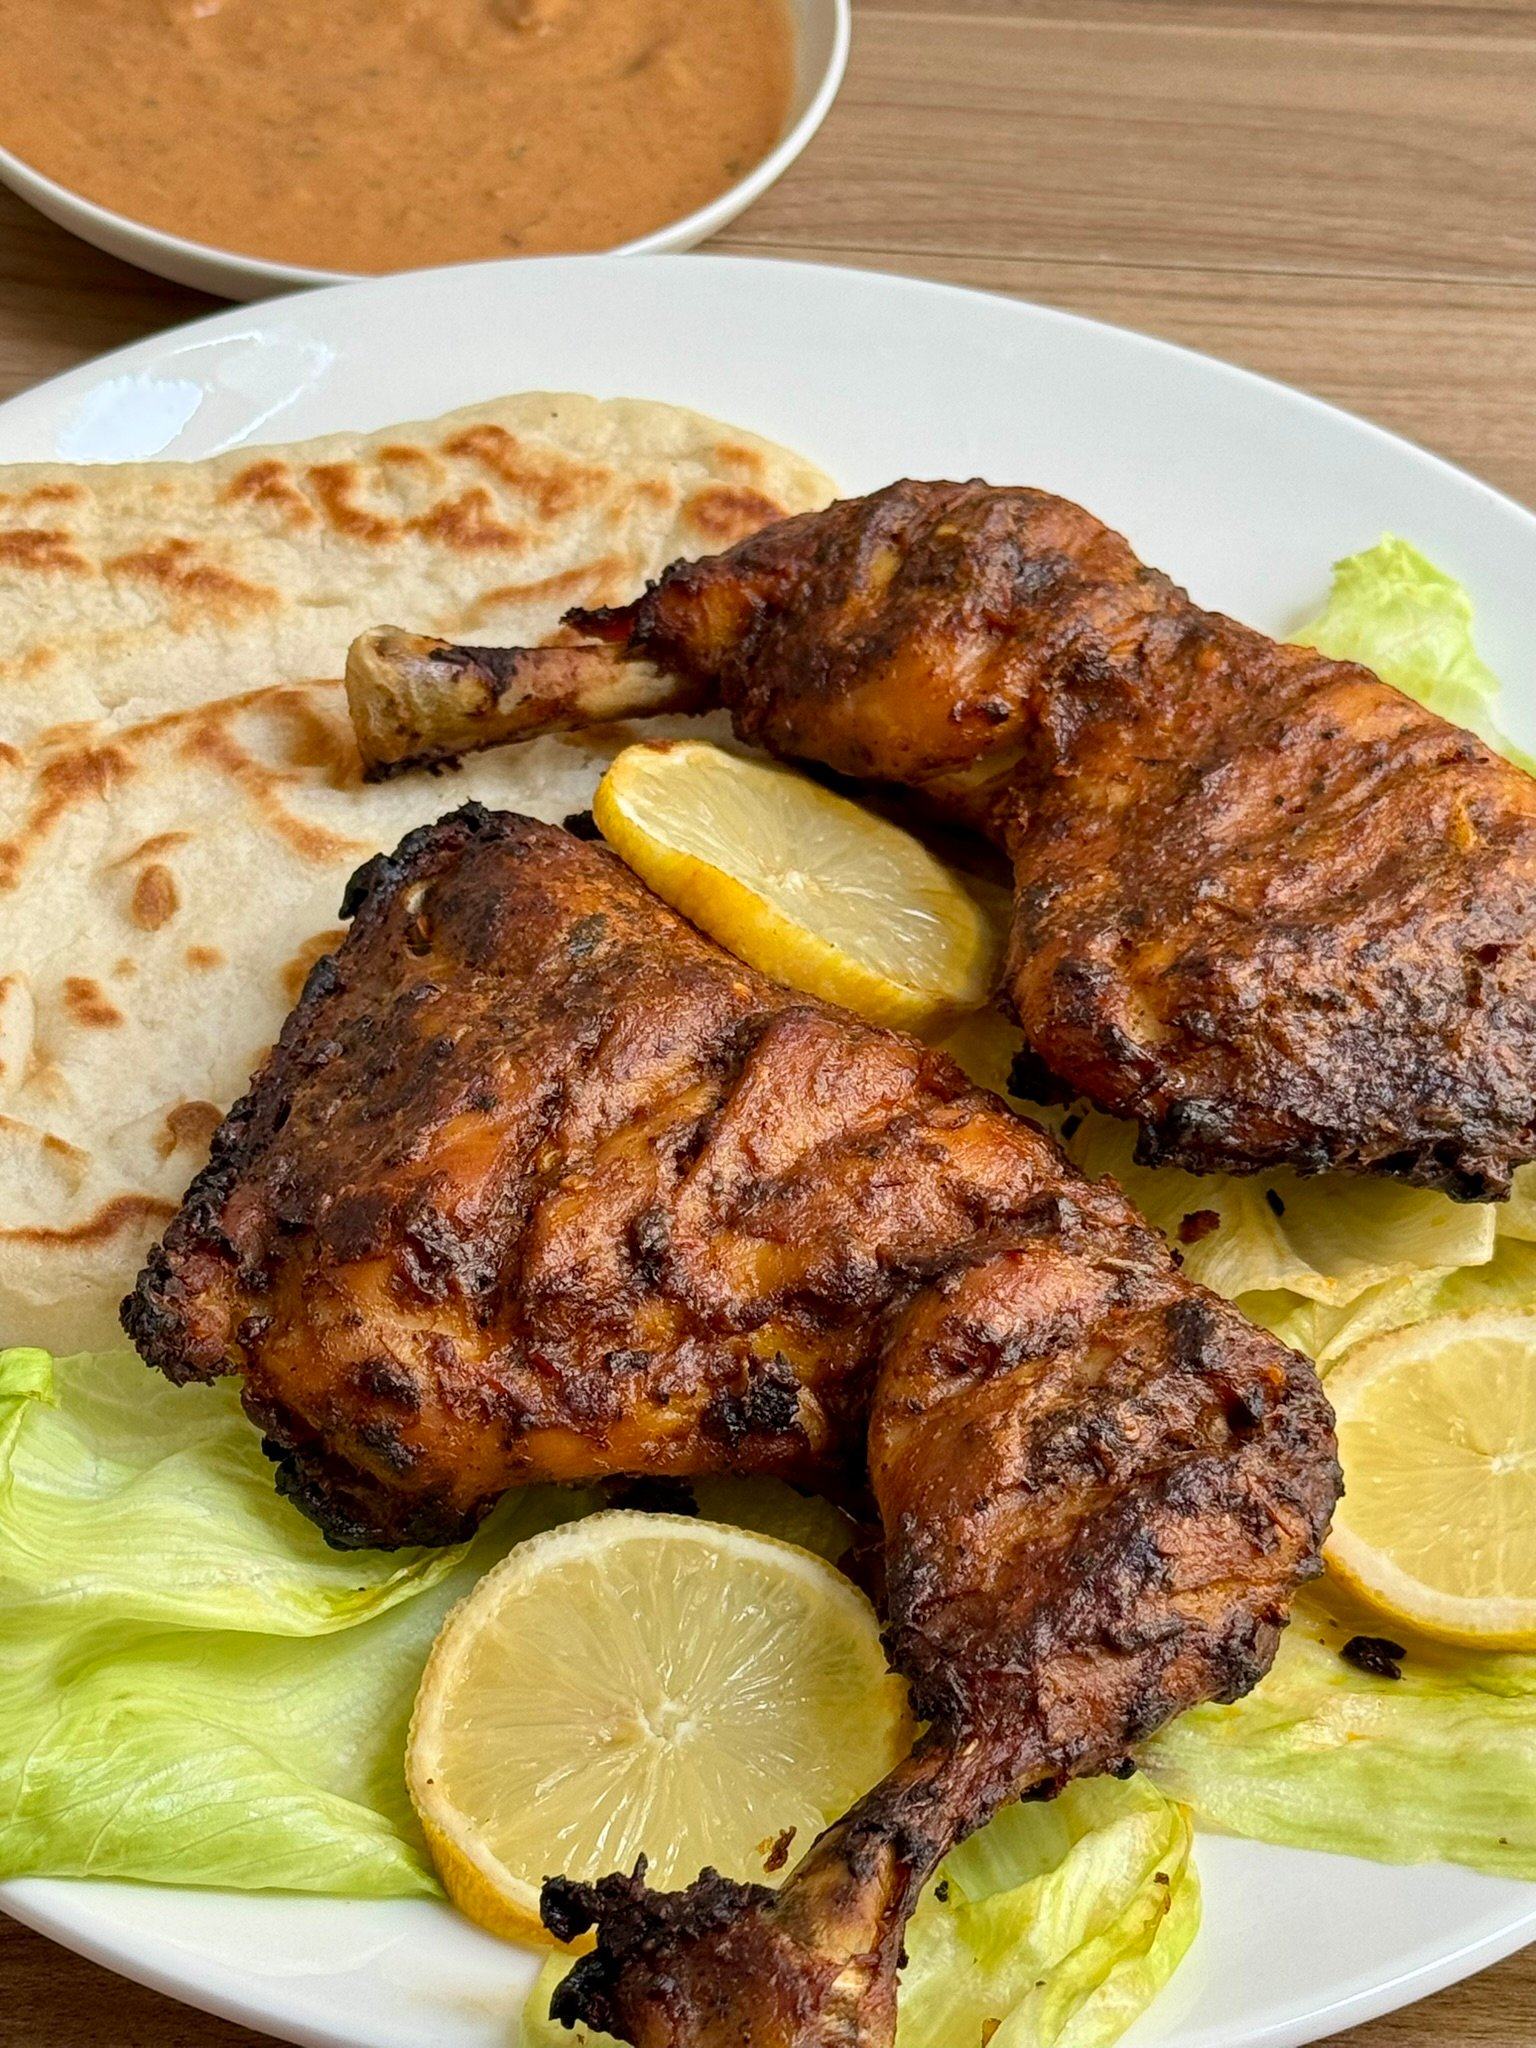
Why the wire rack matters
You want the chicken elevated OVER the baking sheet, not sitting in a pan. Hot air circulates underneath, the drippings fall away, and the surface chars instead of stewing in its own juices. This is the closest an oven gets to mimicking a grill.
Rub cold butter directly across the metal bars of the rack before laying the chicken down. It keeps the meat from sticking and tearing when you flip it.
Baste, flip, repeat
Every 10 minutes, pull the chicken out, brush both sides generously with the pan drippings and reserved sauce, then flip. DO NOT skip this. The basting builds up layers of caramelized sauce on the chicken, and the flipping cooks it evenly. Chicken that just sits in the oven for 40 minutes untouched comes out dull.
Know when it's done
Time alone isn't a doneness cue — oven temperatures vary. The chicken is done when the internal temperature at the thickest part of the thigh reads 165°F/74°C, the juices run clear, and the exterior has a deep, mahogany char. A meat thermometer is the only real way to know. Stick it into the thickest part of the thigh, avoiding the bone.
The foil-bake alternative
If you want fall-off-the-bone tender chicken instead of a grilled-skin texture, cover the tray tightly with foil for the first 30 minutes, then uncover, baste, and finish under the broiler for the last few minutes. You'll lose some of the char, but you'll gain juiciness. This is a solid move when you're serving it with rice and want the chicken saucy rather than crispy.
Tips
- Score the chicken deeply. Three to five slits per piece let the marinade get into the meat, not just sit on the surface. Especially important if you're short on marination time.
- Marinate as long as you can. 2–3 hours minimum, overnight is best. Deeper scoring helps if you're short on time.
- Freezer prep works great. Marinate the chicken with the sauce and freeze in a bag for up to a month. Thaw in the fridge overnight before cooking.
- Balance a too-spicy sauce with a squeeze of lemon, a splash of vinegar, or a small spoon of honey. Any of these dial the heat back without ruining the flavor.
- Let the chicken rest loosely covered with foil for 5–10 minutes before serving. The juices redistribute and the meat stays tender.
What to Serve with Peri Peri Chicken
Piri Piri is at its best with something starchy and something crunchy on the plate.
The Nando's-style combo is Peri Peri chicken with fries and coleslaw. Also great with garlic rice and grilled corn on the cob for a fuller meal. For something lighter, serve it with warm naan, a squeeze of lemon, and a big fresh salad.
The creamy dip is essential no matter what else is on the plate. DO NOT skip it.
Homemade Peri Peri Chicken (with Sauce)
Ingredients
For the chicken marination
- 2 lbs bone-in skinless chicken (thighs + drumsticks or leg quarters)
- ½ tsp salt
- ½ tsp black pepper
- For the Peri Peri sauce
- 1 small-to-medium red bell pepper halved lengthwise and deseeded
- 1 medium green chili deseeded
- 9 garlic cloves peeled and left whole
- 1 small onion separated into layers
- 2 scotch bonnet peppers optional — skip if unavailable
- ¼ cup freshly squeezed lemon juice
- 3 tbsp apple cider vinegar
- 2 tbsp cooking oil any kind
- 2 tsp tomato paste
- 1 tbsp dried oregano
- 1 tsp pink Himalayan salt or any salt
- ½ tsp ground black pepper
- ½ tsp chili flakes
- ½ tsp lemon zest
- ½ tsp cayenne pepper skip for mild
For grilling
- 3 tbsp butter
For serving
- 3 tbsp mayonnaise or yogurt / sour cream

Instructions
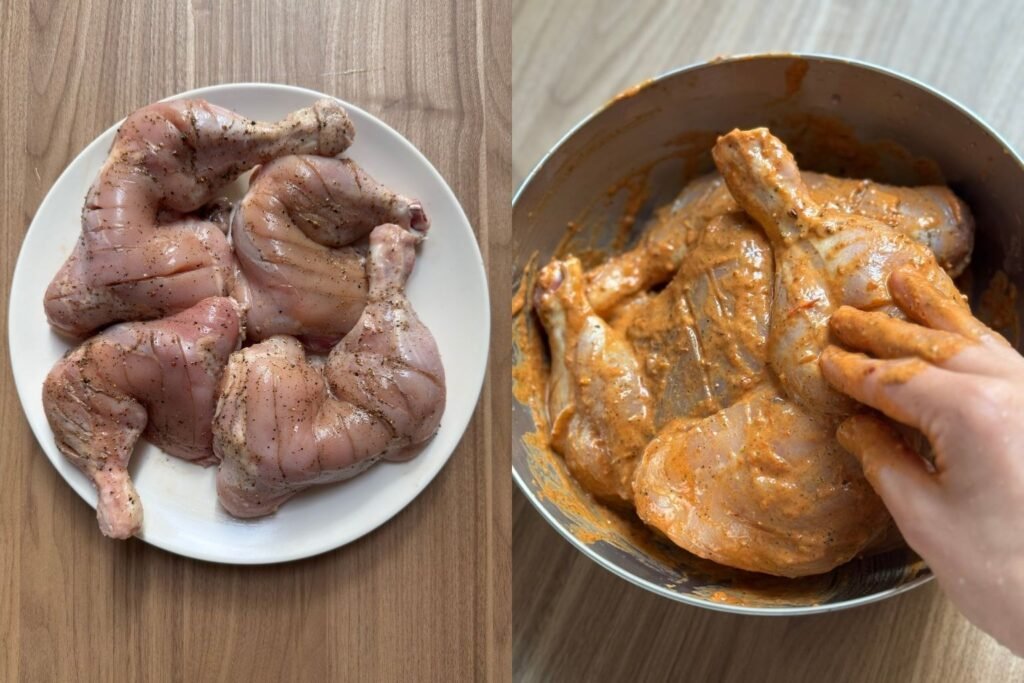
- First marination: Wash the chicken. Cut 3–5 deep slits into each piece. Season all over with ½ tsp salt and ½ tsp black pepper. Cover and rest at room temperature for a couple of hours, or refrigerate for longer.
- Roast the sauce vegetables: Preheat oven to 450°F/232°C. Line a baking tray with parchment. Arrange the red bell pepper (cut side down), green chili, garlic cloves, onion layers, and scotch bonnets on the tray. Brush lightly with oil. Roast for 40 minutes, flipping halfway through, until wilted and lightly charred at the edges.
- Blend the sauce: Transfer the roasted vegetables to a blender or food processor. Add the lemon juice, apple cider vinegar, oil, tomato paste, oregano, salt, black pepper, chili flakes, lemon zest, and cayenne. Blend until smooth.
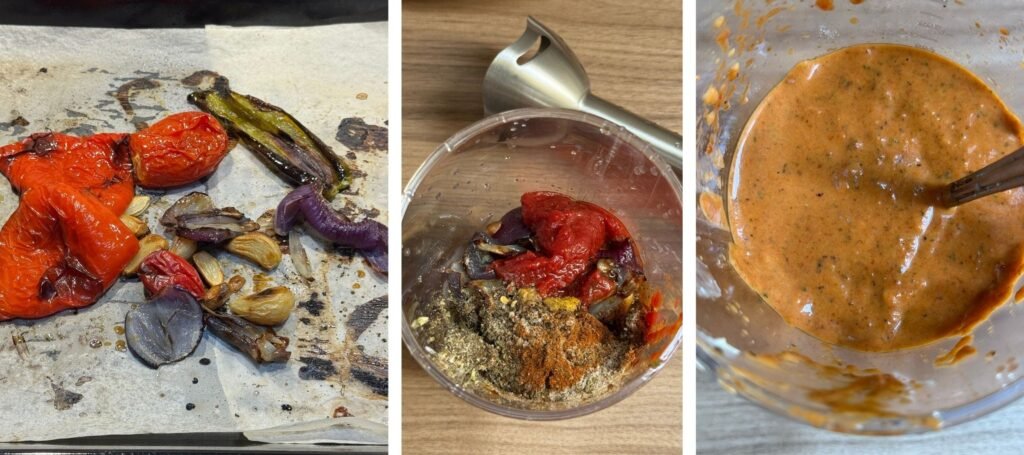
- Reserve, then marinate: Set aside ⅓ cup of the sauce for basting and dipping. Rub the remaining sauce all over the chicken pieces, working it into the slits. Cover and refrigerate for at least 2–3 hours, ideally overnight.
- Bring to room temperature: Take the chicken out of the fridge 30 minutes before cooking. Preheat oven to 350°F/175°C.
- Prepare the rack: Line a baking tray with parchment paper. Place a wire rack over it. Rub cold butter directly across the metal bars so the chicken won't stick.
- Bake, baste, flip: Arrange the chicken pieces in a single layer on the rack. Bake for 40 minutes total. Every 10 minutes, pull the chicken out and brush both sides generously with butter and the reserved sauce, then flip. DO NOT skip the basting.
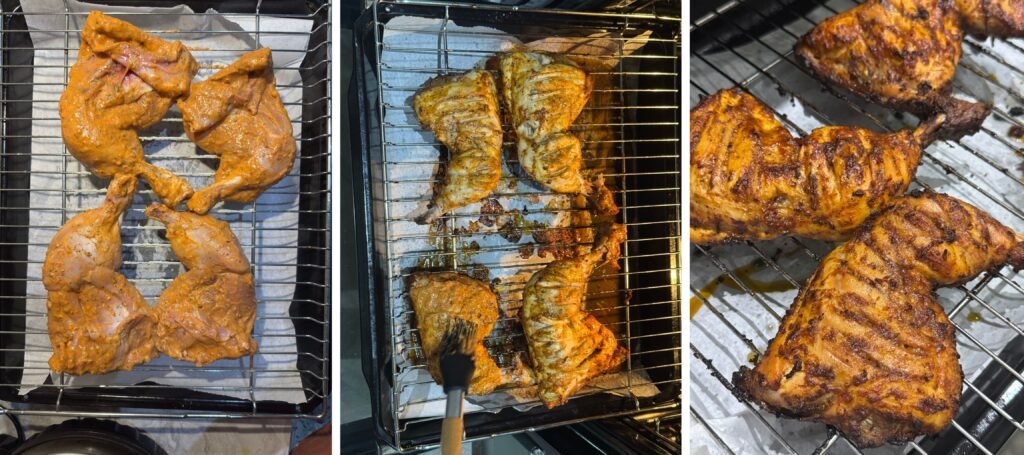
- Rest: Remove from the oven and rest, loosely covered with foil, for 5–10 minutes. Internal temp should read 165°F/74°C at the thickest part of the thigh.
- Make the creamy dip: Mix any leftover reserved sauce with the mayonnaise (or yogurt / sour cream). Taste and adjust — more salt, more mayo to mellow the heat, or a pinch of sugar for sweetness.
- Serve: Serve hot with lemon wedges and your choice of sides — fries, rice, naan, coleslaw, or corn on the cob.
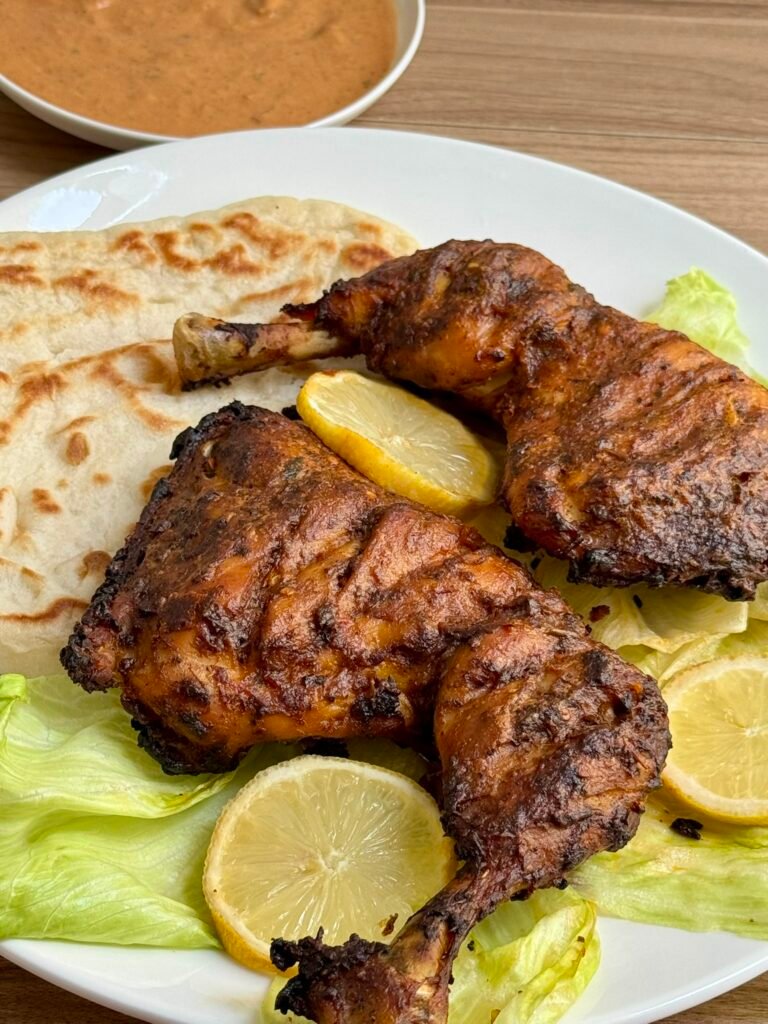
Notes
- No grill? No problem. Elevating the chicken on a buttered wire rack over a baking sheet mimics an outdoor grill. Hot air circulates underneath, creating a charred finish without letting the chicken sit in its own juices.
- Foil-bake option. For extra-juicy, tender meat over a grilled-skin texture, cover the tray tightly with foil for the first 30 minutes, then uncover, baste, and finish under the broiler.
- The sauce keeps for up to 2 weeks in a sealed jar in the fridge, or 3 months in the freezer.
- Marinated raw chicken can be frozen for up to a month. Thaw in the fridge overnight, then let it come to room temperature before cooking.
- ALWAYS use a meat thermometer to check doneness. Internal temp should reach 165°F/74°C at the thickest part of the thigh.
Frequently Asked Questions
Can I grill this outdoors instead of using the oven?
Yes — it's actually better on a real grill. Marinate as directed, then cook over medium-high heat, basting and flipping every 5–7 minutes until the internal temp hits 165°F/74°C. The char you'll get from a grill beats anything an oven can do.
Can I air fry Peri Peri chicken?
Yes. Cook at 375°F/190°C for about 25–30 minutes depending on the size of the pieces, flipping and basting halfway through. Check the internal temperature to be sure.
Can I make the sauce ahead?
Yes. Store it in a sealed jar in the fridge for up to 2 weeks, or freeze it in portions for up to 3 months.
How do I reheat leftovers?
Oven or air fryer beats the microwave every time. Reheat at 350°F/175°C for about 10 minutes, covered loosely with foil so it doesn't dry out. If you've got leftover creamy sauce, brush some on before reheating.
Can I use boneless chicken?
Yes, but cut the cook time significantly. Boneless thighs take about 25 minutes at 350°F, chicken breast about 20 minutes. Check with a thermometer — 165°F/74°C at the thickest point.



0 Comments